So You Want to Olympic Lift Your Team Part 5: The Jerk
In the final installment of this series, we delve into the intricacies of the Jerk, a unique lift that stands apart from the Clean and the Snatch due to its shoulder to overhead movement. The Jerk also offers a lot of variety when it comes to execution so we will discuss potential variations as well as preference for general teaching.
Despite its versatility, the Jerk often takes a back seat in the athletic setting unless your population competes in Olympic Weightlifting. However, derivatives of the Jerk, such as shoulder press, push press, dumbbell pressing variations, and landmine presses, find more utility when an overhead pressing movement is needed.
Nonetheless, let’s discuss how to introduce and teach this final Olympic movement:
- Shoulder Press
- Push Press
- Push Jerk
- Jerk Variations
Let’s explore each step in detail.
1. Shoulder Press
Assuming athletes have progressed through clean and snatch, the shoulder press serves as a logical starting point. The bar will start in a front rack position similar to a clean and the bar will pass the face, which an athlete has experienced during snatch progressions. It is important to note that shoulder press primarily engages the upper body; the lower body does not assist in initiating upward movement of the barbell. Since shoulder press is strictly upper body, the weight lifted overhead will be limited, making the shoulder press an ideal starting point to introduce the Jerk progression. A couple of key points for set up include:
1. Maintaining an upright posture
2. Strong front rack position
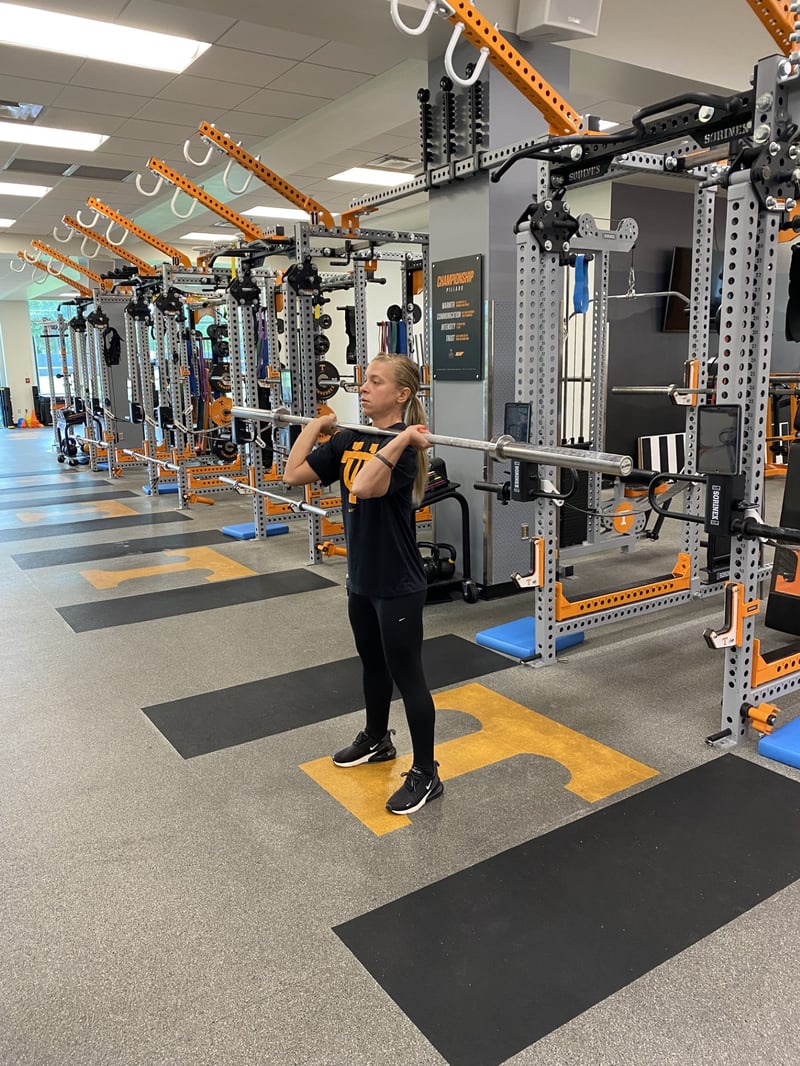
Front Rack Position
It is worth noting that the front rack position resembles that of receiving a clean, but elbows will be lowered slightly to roughly 45 degrees. This adjustment will allow for a more stable wrist position and a straighter bar path overhead.
Before lifting the bar overhead, instruction of head movement and placement is essential. Keep the head in a neutral position and avoid tilting the head backward or looking up excessively. As the bar begins to move upward, tuck the chin back slightly. Once the barbell has completely passed the face, the head can begin to push slightly forward. I refer to this final head movement as “pushing the head through the window”. The “window” is the space created between the arms when the barbell is overhead. The arms should be aligned with the ears at the completion of the lift.
2. Push Press
The transition to the push press from shoulder press is straightforward. The setup remains the same as the shoulder press but will have slight utilization of the lower body to initiate the upward motion of the barbell. I often refer to push press as being “50/50” utilization of both upper and lower body. Incorporation of the lower body acts almost as a kickstarter of upward barbell movement; this allows the athlete to lift more weight than the shoulder press. This is a great transition movement since the Jerk requires full utilization of the lower body as well as potential footwork based on the variation used.
A crucial technical aspect introduced during the push press is the “dip and drive”.
Dip: the initial phase of movement. The athlete initiates the dip by bending the knees and creating downward movement while keeping the torso upright. The dip is not a full squat but rather a short, controlled downward movement.
Drive: following a well-executed dip, the drive phase follows. The drive is an explosive and rapid change of movement to propel the barbell upward.
As athletes become more refined in their dip and drive technique, the fluidity of the movement will be more easily transferred to the Jerk.
Completion of the push press is the same as the shoulder press. The barbell will finish overhead, head through the “window” and arms aligned with the ears. The lower body will be fully extended in the receiving position since a re-bend of the lower body has not been introduced yet.
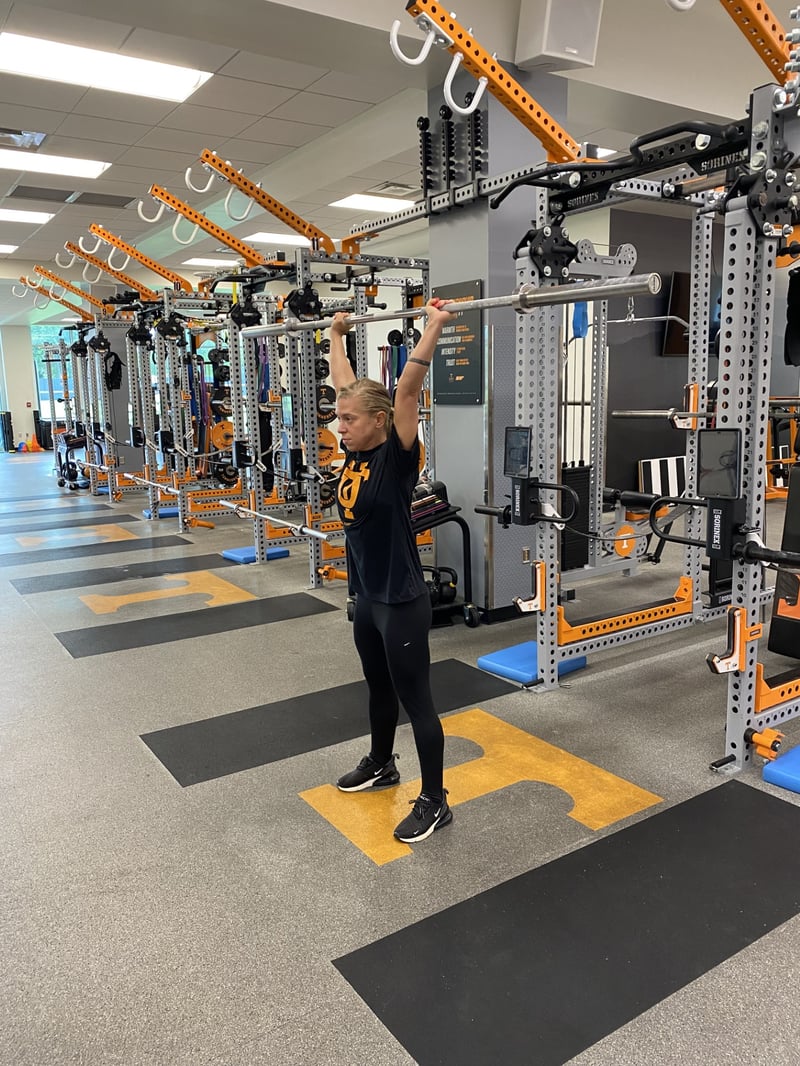
Push Press - Extended Receiving Position
3. Push Jerk
This is the final step in our progression. As mentioned earlier, there are variations of jerk that can be taught based on the population of athletes but unless an athlete is competing in the sport of Olympic Weightlifting, I often refrain from teaching different competitive variations of jerk. In this final step, set up will remain the same as our previous steps. The biggest difference between push jerk and the progressions to this point will be the receiving position.
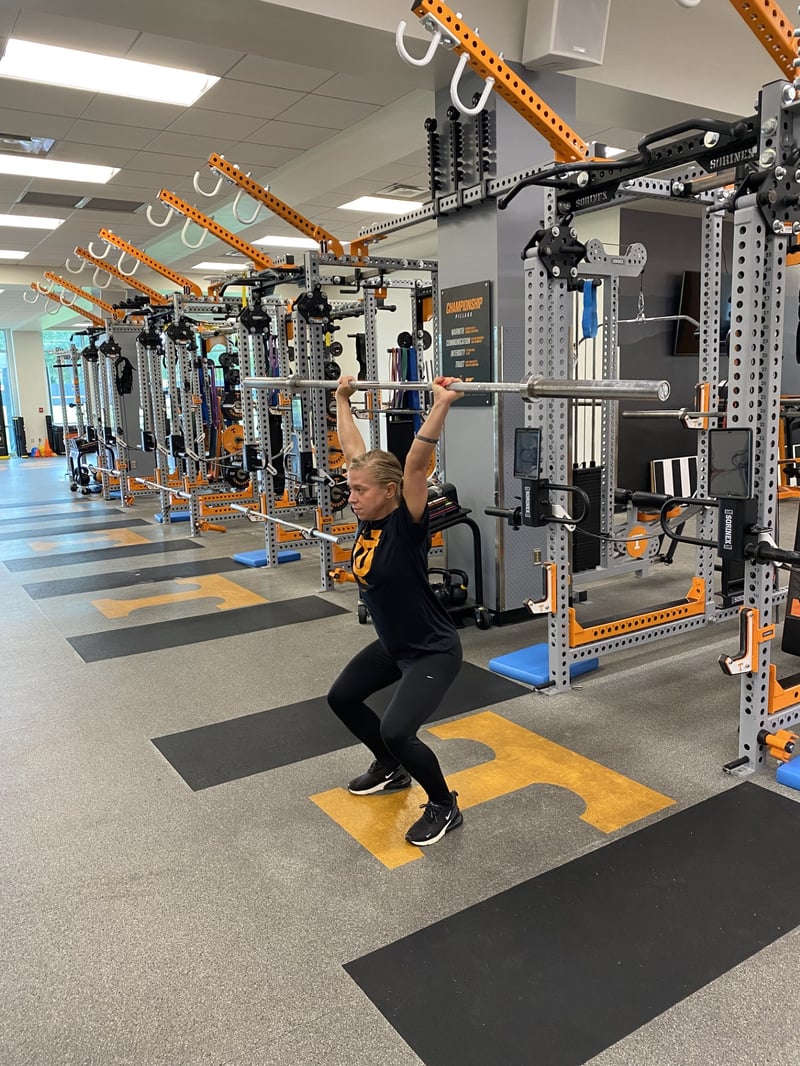
Push Jerk - Receiving Position
Utilization of the lower body is greater for push jerk and the athlete will receive the barbell overhead while re-bending the knees as opposed to the fully extended receiving position that is observed in the push press.
The re-bend is characterized by flexion of hips and knees which allows the athlete to essentially move under the barbell in a controlled fashion. This dynamic receiving position allows the athlete to stabilize heavier weight overhead and more closely mimics the Olympic lifting often seen in competition.
4. Jerk Variations
There can be endless variations of jerks ranging from the more familiar split jerk and squat jerk, frequently seen in competition, to more specialized training techniques such as behind the neck jerk and jerk from blocks. For this article, we will focus on the more widely used competition variations – the split jerk and squat jerk. While each variation begins in the same manner, the distinction lies in the receiving position.
4A. Split Jerk
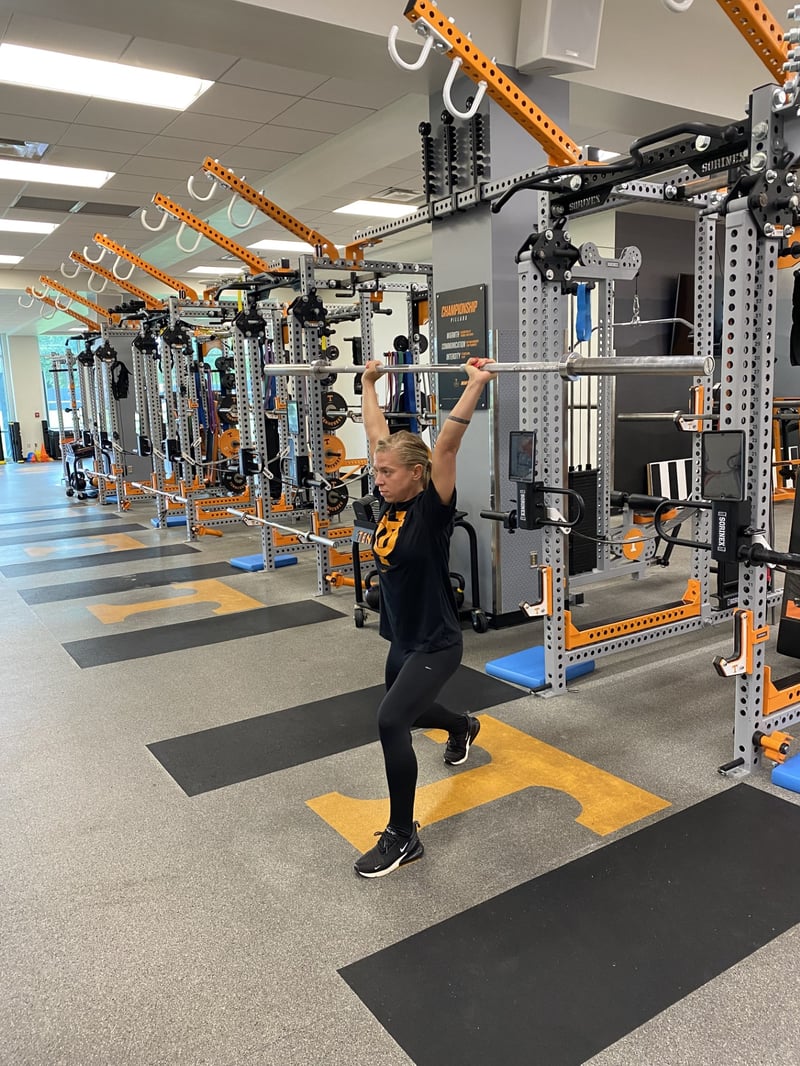
Split Jerk - Receiving Position
The most widely used variation of jerk for competition, uses a split stance receiving position which allows for a wider base of support and greater stability overhead. Once an athlete has demonstrated proficiency with push jerks, introduction of a split jerk may be appropriate. When introducing a split jerk, I prefer to work on footwork drills without a barbell first.
Footwork drills
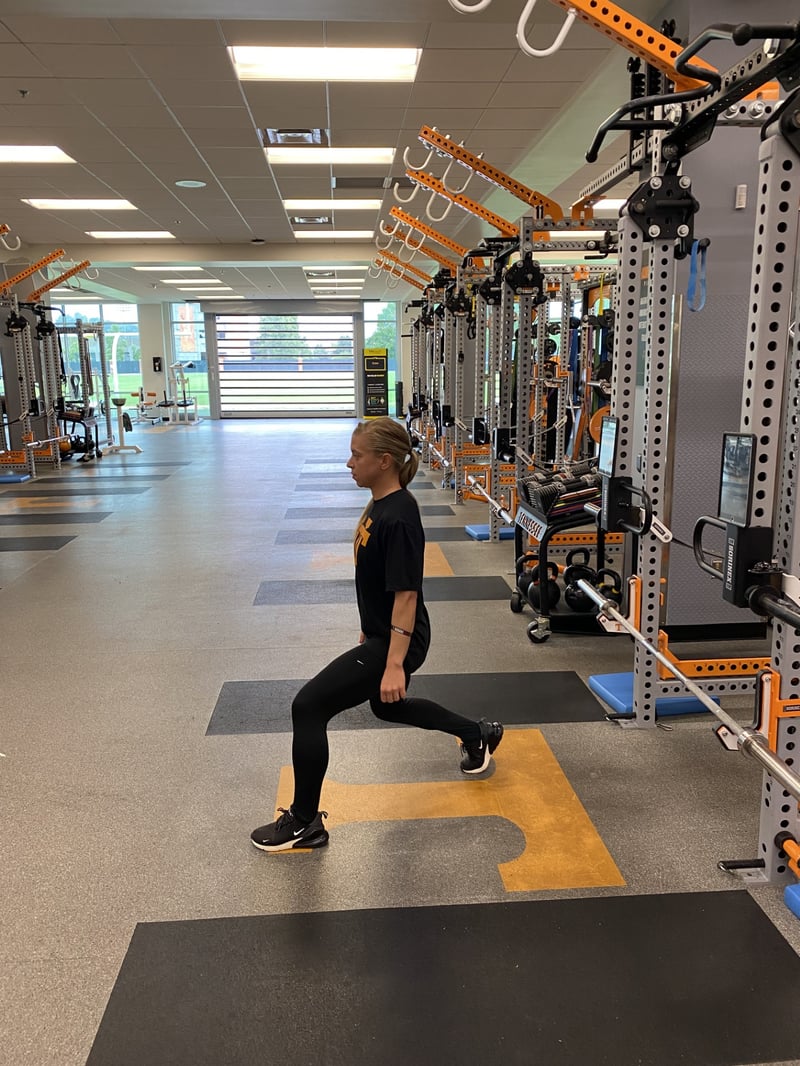
Split Jerk - Footwork Drill
These drills help athletes develop proper coordination, balance and timing which are all critical for a successful lift. When introducing footwork drills, I use targets for the athletes to reach in order to ensure proper foot placement. I ask the athlete to imagine they are standing in the middle of perfect square and each of their feet need to land on the opposite corner of the square. The front leg will be bent and the back leg should also have a soft knee bend with weight distribution sitting almost evenly through the hips. One can even argue that weight distribution may be shifted slightly toward the back leg in a proper split jerk position.
Recovery
Once an athlete has performed a proper split position, focus needs to shift to executing a proper recovery. The front leg will be shifted back to the original starting position followed by the back leg. Once both legs are positioned under the athlete, have the athlete reset their feet to a comfortable width in order to stabilize the barbell overhead.
Completing barbell-free footwork drills with targeted placement as well as execution of proper recovery lay the foundation of a technically proficient split jerk. Once these drills can be completed flawlessly, I begin to incorporate a barbell in order to perform a true split jerk.
4B. Squat Jerk
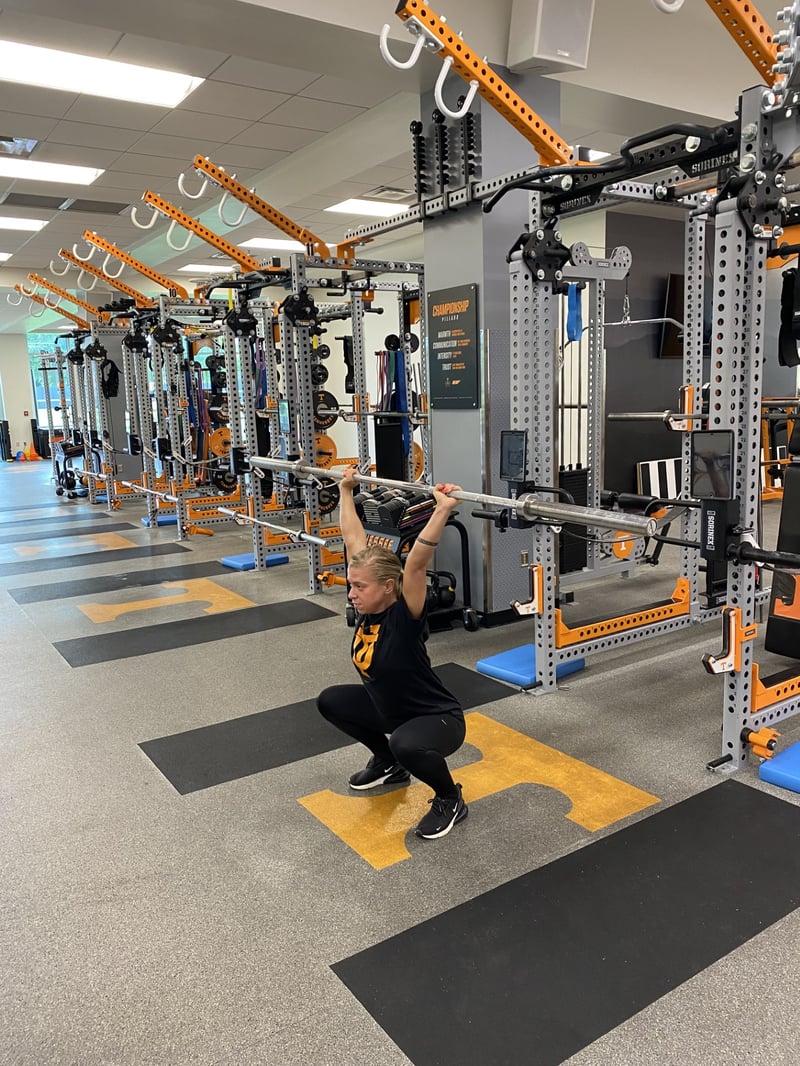
Squat Jerk - Receiving Position
The less common of the two competition variations listed due to its demand for exceptional mobility and high technical difficulty, the squat jerk involves catching a barbell in a full overhead squat position without splitting the feet. In this variation, an athlete will begin the squat jerk in the same manner as all other variations listed. A squat jerk differs during the descent in order to receive the barbell overhead. Instead of a slight re-bend, an athlete will descend into a full overhead squat position with arms fully extended and the torso remaining upright. Recovery in a squat jerk requires an athlete to stand fully extended while maintaining the barbell in a stable overhead position. Although extremely demanding to perform, when executed properly, a squat jerk appears tremendously graceful.
Final Tips for Success:
- Keep your coaching cues short, simple, and consistent.
- Demonstrate the movement and/or lift for the athlete.
- Use cadence to control the group -> especially when working with a larger number of athletes. Cadence forces athletes to hold specific positions which reinforces technique.
- Move around while coaching to see lift from multiple angles.
- Repeat names of movements and lifts to familiarize athletes.
- Ask athletes questions to make sure they are understanding and retaining information.
- Give breaks -> If you are speaking for a while, let the athletes put the barbell down.
- How quickly athletes move through a progression will be dependent on the group -> use discretion as a coach.
Subscribe to our blog
Subscribe to receive the latest blog posts to your inbox every week.
Related posts
Cooks Before Chefs: 4 Steps to Teaching Young Coaches to Program

So You Want to Olympic Lift Your Team: Part 4 - The Power Snatch


